Physical Address
304 North Cardinal St.
Dorchester Center, MA 02124
Physical Address
304 North Cardinal St.
Dorchester Center, MA 02124

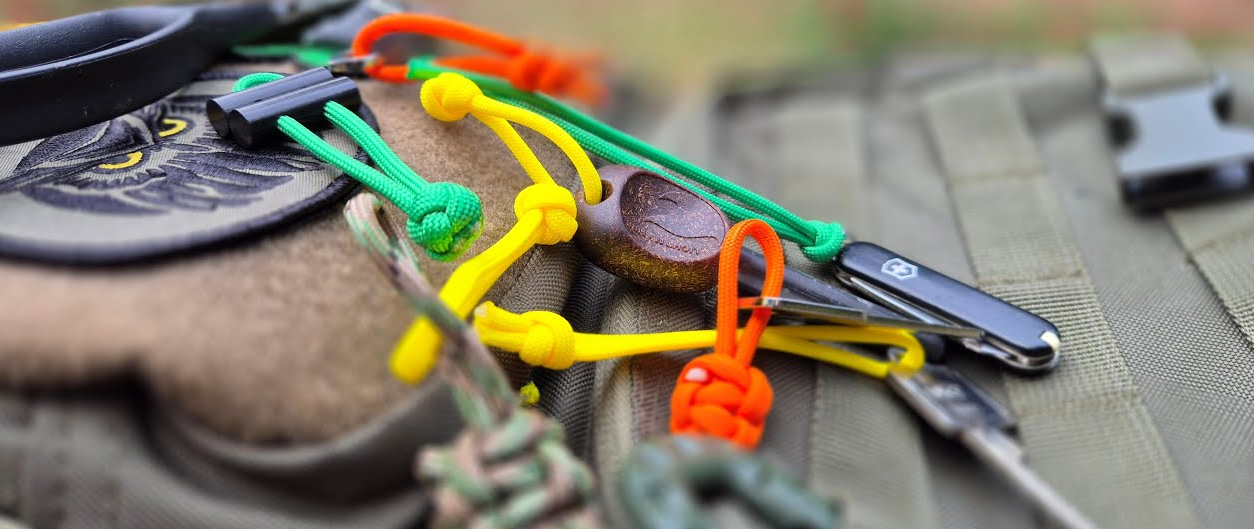
If you fish from a boat, kayak, or pier long enough, you eventually hear that small but painful sound: pliers, cutters, or a flashlight hitting the water and disappearing. Wet decks, cold hands and boat wake all work against you, and any tool that isn’t clipped or tied down is living on borrowed time.
This guide shows how to fix that with a few pieces of paracord and some small hardware. You’ll learn how to make simple DIY paracord lanyards for fishing pliers, line cutters, mini flashlights and other tools, plus how to add beads for paracord that improve grip and color-code your gear.
We’ll walk through several step-by-step mini projects: a wrist lanyard for pliers, a clip-on lanyard for boats and kayaks, and short color-coded tails for small tools. By the end, you’ll have a clean, tested system that keeps your essentials close at hand instead of at the bottom of the lake.
Most fishing tools go overboard during rushed, clumsy moments – not because anglers don’t care, but because of how we actually move on the water. A lanyard system works because it gives every tool a leash and a predictable “home” instead of balancing on the edge of a gunwale.
On a boat or kayak, there’s always motion under your feet. You lean to net a fish, a wake hits the hull, or a buddy shifts his weight at the wrong second. Pliers left on a cooler lid or a mini light sitting on the gunwale are one bump away from a splash.
Grip is another problem. Slime, sunscreen, wet braid and cold fingers turn even rubber-coated handles into soap bars. As you squeeze harder to hold on, you lose fine control – that’s when a small tool can shoot out of your hand, skip off the deck, and vanish.

Clutter makes it worse. The more you stack tools on top of each other in a tackle tray, the easier it is for one to drag another along when you grab something in a hurry. A simple paracord tail with a bead makes each tool easier to see and grab, so you’re not raking through gear blindly.
Visibility is the quiet killer. Dark tools on a dark, wet deck disappear visually. A bright strip of paracord can be the difference between “I see it, I’ve got it” and “where did that go?” – especially in low light or when you’re focused on a fish at the net.
A good lanyard setup doesn’t turn you into a tidy person overnight. It just narrows your options: instead of “tool can be anywhere,” it’s always attached to a known point – your wrist, your belt, your crate, or the boat rail.
You don’t need a workshop to build a reliable lanyard system. A Ziploc-sized kit is enough to outfit most of your tools. The key is choosing materials that are strong, simple, and easy to handle with wet fingers.
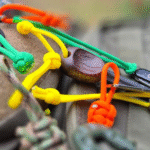
The backbone is standard 550 paracord. It’s strong, slightly springy, easy to knot, and still workable when soaked. A few meters in two or three bright colors is enough to build several lanyards. Pick at least one high-visibility color (chartreuse, orange, neon green) so dropped tools stand out on deck or in the bilge.
Next, grab a handful of small carabiners or snap clips. Stainless steel or coated aluminum works best around saltwater; plastic clips are fine for freshwater and lighter tools. Look for clips you can open one-handed, even with cold or gloved hands, but that won’t pop open under tension.
Small split rings and swivels are useful for tools that don’t have a built-in lanyard hole. A split ring near the joint of pliers or on the handle of cutters creates an anchor point for your paracord without drilling or modifying the tool. Swivels help keep the cord from twisting as you work.
Beads are where function and customization meet. For color-coding and extra grip, many anglers use beads for paracord that stand out against the water and deck. One bead can mark the job of the tool (red for cutters, blue for pliers, green for hook removers), while another bead near the end of the cord gives you a solid grab point.
Round, barrel, or slightly oval beads work best on lanyards—they’re smooth, won’t snag easily, and feel good between your fingers. Make sure the bead’s hole is at least 4–5 mm so 550 paracord passes through cleanly; 6 mm is comfortable if you’re doubling the cord.
Finally, toss a small pair of scissors and a lighter into your kit. The scissors are for clean cuts, and the lighter melts and mushrooms the paracord ends so they don’t fray. That’s all you need to build and adjust lanyards on the dock, at camp, or in the garage.
Good lanyards keep tools from vanishing; bad ones create tangles or, in the worst case, entanglement risks. A few simple rules keep your system safe and comfortable to use.
First, avoid tying tools directly to your neck or anything that tightens around your throat or chest. If you attach tools to your PFD, use short lanyards and consider a breakaway connector that will give under serious load. The goal is “retention, not restraint.”
Length is more important than it looks. Longer is not better. A lanyard should be just long enough for you to comfortably use the tool where you need it, and no more. For pliers at your hip, 30–45 cm (12–18 in) is usually enough. Excess cord becomes a loop that catches rod guides, net frames, pedals, and feet.
Build in a weak link for worst-case scenarios. A lighter plastic clip, a small zip tie, or a short length of thinner cord between the main lanyard and the attachment point can serve as a fuse. If the line gets fully snagged or you fall in and something hangs up, that sacrificial link will break before it locks you to the boat or structure.
On kayaks, keep lanyards inside the cockpit zone where you can see and reach them. Avoid having cords drape over the side where they can scoop weeds or catch on docks, branches, or submerged junk. Sit in the boat on dry land and do a mock “day of fishing” to see what touches your legs, feet, and paddle.
Inspect hardware regularly, especially in saltwater. Corrosion eats springs and weakens split rings faster than most people expect. If a clip starts feeling gritty, sticky, or rusty, replace it before it becomes the point of failure. Paracord itself lasts a long time; metal parts don’t.
And don’t tether everything just because you can. Start with your “must save” items: pliers, cutters, multitool, small flashlight, maybe a handheld GPS or radio. Rods, nets and paddles might need different leash styles. The simpler your lanyard layout, the more likely you are to actually use it.
A wrist lanyard keeps your most-used tool – usually pliers or cutters – attached to you at the exact moment you’re most likely to drop it. This project is quick, easy, and a good first build.
At a glance, you’re making a loop that goes around your wrist with the tool on the other end. The loop cinches gently so it doesn’t slip off, and a bead helps you adjust and find it by feel.
Step 1: Cut and prep the cord
Cut a length of paracord about 70–80 cm (28–32 in). This gives room for knots and an adjustable wrist loop. Melt both ends lightly with a lighter and flatten them so they don’t fray.
Step 2: Attach the tool
Thread one end of the cord through the lanyard hole or through a split ring on your pliers or cutters. Tie it off with a double overhand or figure-eight knot and pull tight. Tug hard on the tool to make sure it won’t slip.
Step 3: Form the wrist loop
Bring the free end back toward the tool so the cord forms a loop big enough to slide over your hand and jacket cuff. Hold the two parallel strands together near the tool, then tie a simple overhand knot in both strands at once. When tightened, this knot should sit 10–15 cm (4–6 in) away from the tool and shape the loop.
Step 4: Add adjustment and beads
Slide one or two beads onto the loop side. One bead can sit close to the knot as a visual marker; another can act as a sliding adjuster. To make that adjuster, tie a small stopper knot just beyond the bead so it can’t slide off.
Step 5: Test the fit
Slip your hand through the loop and slide the bead down so the cord rests comfortably around your wrist—snug enough that it won’t fall off, loose enough that it doesn’t bite into your skin. Practice opening and closing the pliers with the lanyard in place.
On the water, you’ll put your hand through the loop before unhooking fish or leaning over the side. If the tool slips from your grip, the cord catches it before gravity and water do. After a few trips, you’ll reach for that loop automatically.
Clip-on lanyards give each tool a “home base” on the boat, kayak, or your belt. They’re ideal for tools you want close but not constantly in your hand.
In simple terms, one end of the lanyard clips to something solid (rail, crate, belt loop), and the other end attaches to the tool. With the right length, the tool can reach your work area without ever being able to jump overboard.
Step 1: Choose the anchor point
Decide where the tool should live. On a kayak, that might be a crate rail, seat frame, or track-mounted eyelet. On a boat, common anchors are console rails, rod holder bases, or tackle station handles. On a pier or bank, it might just be your belt loop or a D-ring on a wading belt.
Step 2: Cut and prep the cord
Cut a length of paracord between 60–90 cm (24–36 in). Err on the long side at first; you can shorten it later. Melt the ends as before.
Step 3: Attach the tool
At one end of the cord, tie onto the tool using its lanyard hole or a split ring. A figure-eight follow-through or a snug double overhand works well. Test with a firm pull.
Step 4: Attach the clip
On the other end, tie on your carabiner or snap clip. You can use a figure-eight around the clip’s eye, a bowline, or another secure loop knot. Again, test with a hard pull.
Step 5: Add a grab bead
Slide a bead onto the cord somewhere between the tool and the clip, often 5–10 cm (2–4 in) from the clip. This bead becomes your “grab handle” when you reach down without looking. Tie small stopper knots on each side if you want it fixed in place.
Step 6: Dial in the length
Clip everything where it will live and simulate use: unhook a fish, cut line, change lures. If the tool doesn’t quite reach, lengthen the lanyard by retying a knot. If there’s a lot of slack flopping around, shorten it. When tuned, the tool hangs neatly without dragging or catching.
Repeat this process for any high-priority tool. The goal is that, in rough water or chaos, you can simply grab a bead, pull, and the right tool is there – and when you drop it, it swings back instead of sinking.
Small tools are the first to disappear and the easiest to fix. A simple, color-coded mini lanyard turns nippers, hook files, and tiny lights into gear you can actually find and hold onto.
Here, the lanyard is just a short loop or tail, often with one bead. It’s not about reaching across the boat; it’s about visibility, grip, and quick clipping.
Step 1: Cut short lengths
Cut several pieces of paracord around 15–20 cm (6–8 in). These will become individual mini lanyards for each small tool.
Step 2: Attach to the tool
Thread the cord through any existing hole on the tool or around a narrow neck. Tie the ends together with a square knot or overhand knot to form a loop. For heavier tools, you can add a small split ring as an anchor point first.
Step 3: Add beads and colors
Slide one bead onto each loop. Use color-coding to make tools instantly recognizable:
Tie a small stopper knot at the end of the loop if needed to keep the bead from sliding off.
Step 4: Use loops as clip points
Those small loops can now go over a carabiner on your PFD, a zipper pull on your jacket, or the handle of a tackle bag. Even if you don’t fully leash everything, you at least have fast ways to secure tools when you move spots.
These mini lanyards are a perfect testbed. If a certain length or bead shape annoys you in real use, cut it off and try another combination. Paracord and beads are cheap; lost tools are not.
A lanyard system only works if it matches how you actually fish. A quick test cycle at home and on calm water lets you tune everything before you trust it with your favorite tools.
Think of this as “rig and rehearsal.” First you rig your tools where you think they should live, then you rehearse real movements until the setup feels natural and predictable.
Step 1: Pick your core tools
Lay out what you really use on a normal trip: main pliers, backup cutters, one or two small tools, and a light. Start by building lanyards for those. Everything else can ride along loose until it proves it deserves its own cord.
Step 2: Mount tools in place
Clip pliers and cutters near your dominant hand. On a kayak, that might be the crate side or seat frame at thigh level. On a boat, think about where you stand while unhooking fish. Mount tools so you can grab them without turning your whole body or bending awkwardly.
Step 3: Do a dry run
With the boat or kayak on the trailer or in the driveway, sit or stand in your normal fishing position. Go through your typical motions: cast, retrieve, grab pliers, clip line, put tools away. Close your eyes and try to find each tool by feel using the beads and cord placement. Any tool that makes you twist, stretch, or fumble needs a different home or a shorter/longer lanyard.
Step 4: Water test on a calm day
On your next easy trip, treat the first hour as a system test. Pay attention to where cords snag, which tools you actually use, and what feels like clutter. Note any lanyard that routinely catches a rod or gets under your feet.
Step 5: Trim the system
Back at home, cut away what isn’t working. It’s better to have three perfect lanyards you trust than eight cords that drive you crazy. Adjust lengths, move anchor points, and change bead shapes or colors until everything feels clean and predictable.
Once dialed in, you’ll notice something subtle: you stop thinking about where your tools are. Your hand goes to the same bead every time, and when a wave or fish knocks something loose, it swings back instead of sinking. That’s exactly what a good paracord lanyard system is supposed to do.